# Configuring Medical System (modality)
The main objective of this configuration is to initiate communication between the medical system and the DCMIO.
The following are the steps to configure the medical system (modality).
{% hint style="info" %}
**Attention**:
The console will differ based on Vendor. Therefore, the steps to configure the nodes may also differ between modalities. So, consider the steps below as a reference example to configure any modality.
{% endhint %}
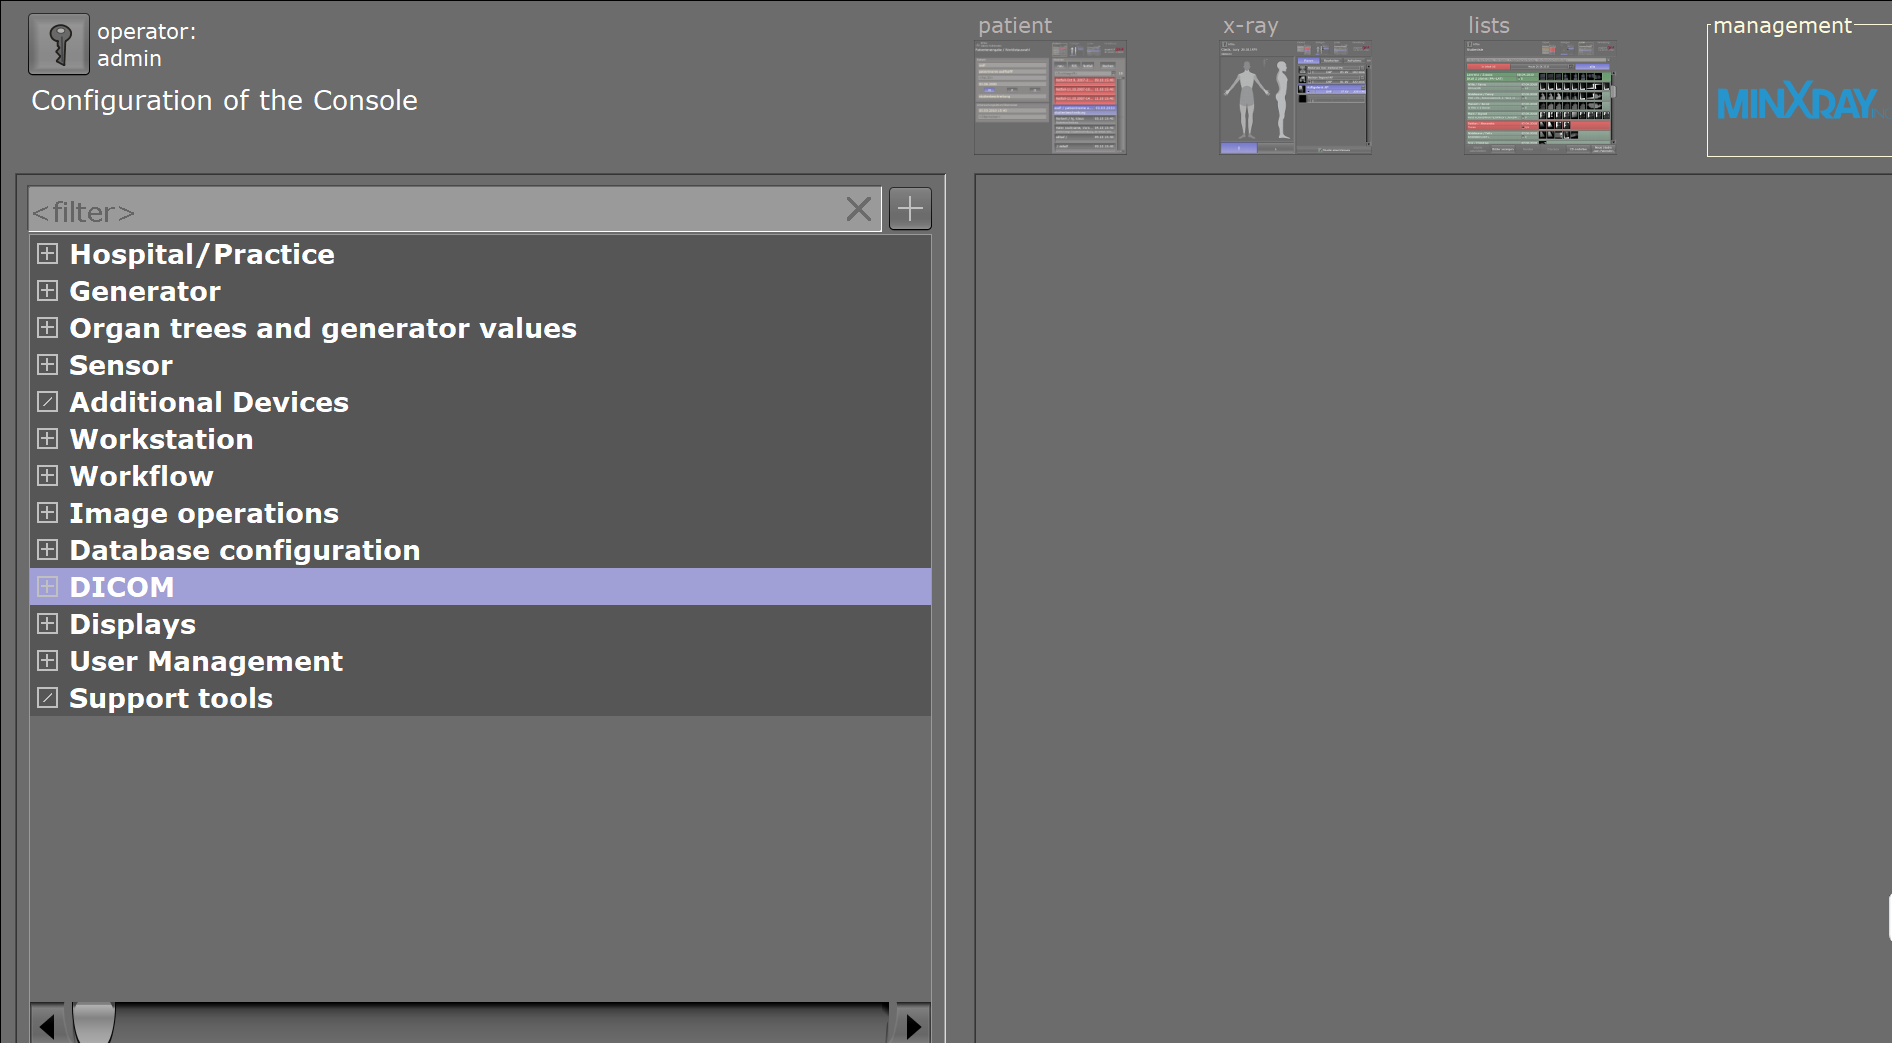
1. Login to the modality console with an admin access privilege.
2. On the modality console, select **DICOM** in the console configuration.
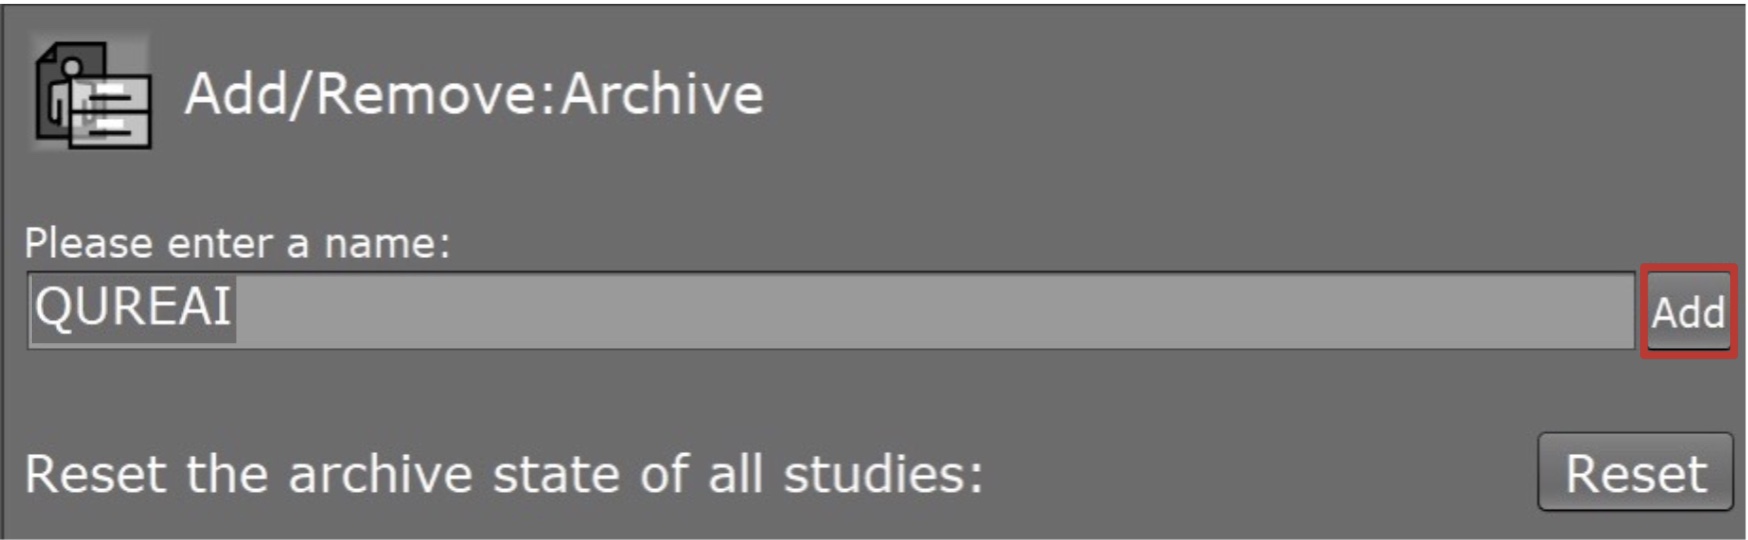
3. On the **Add/Remove: Archive**, type the name/AE Title of DCMIO. Then click **Add**.
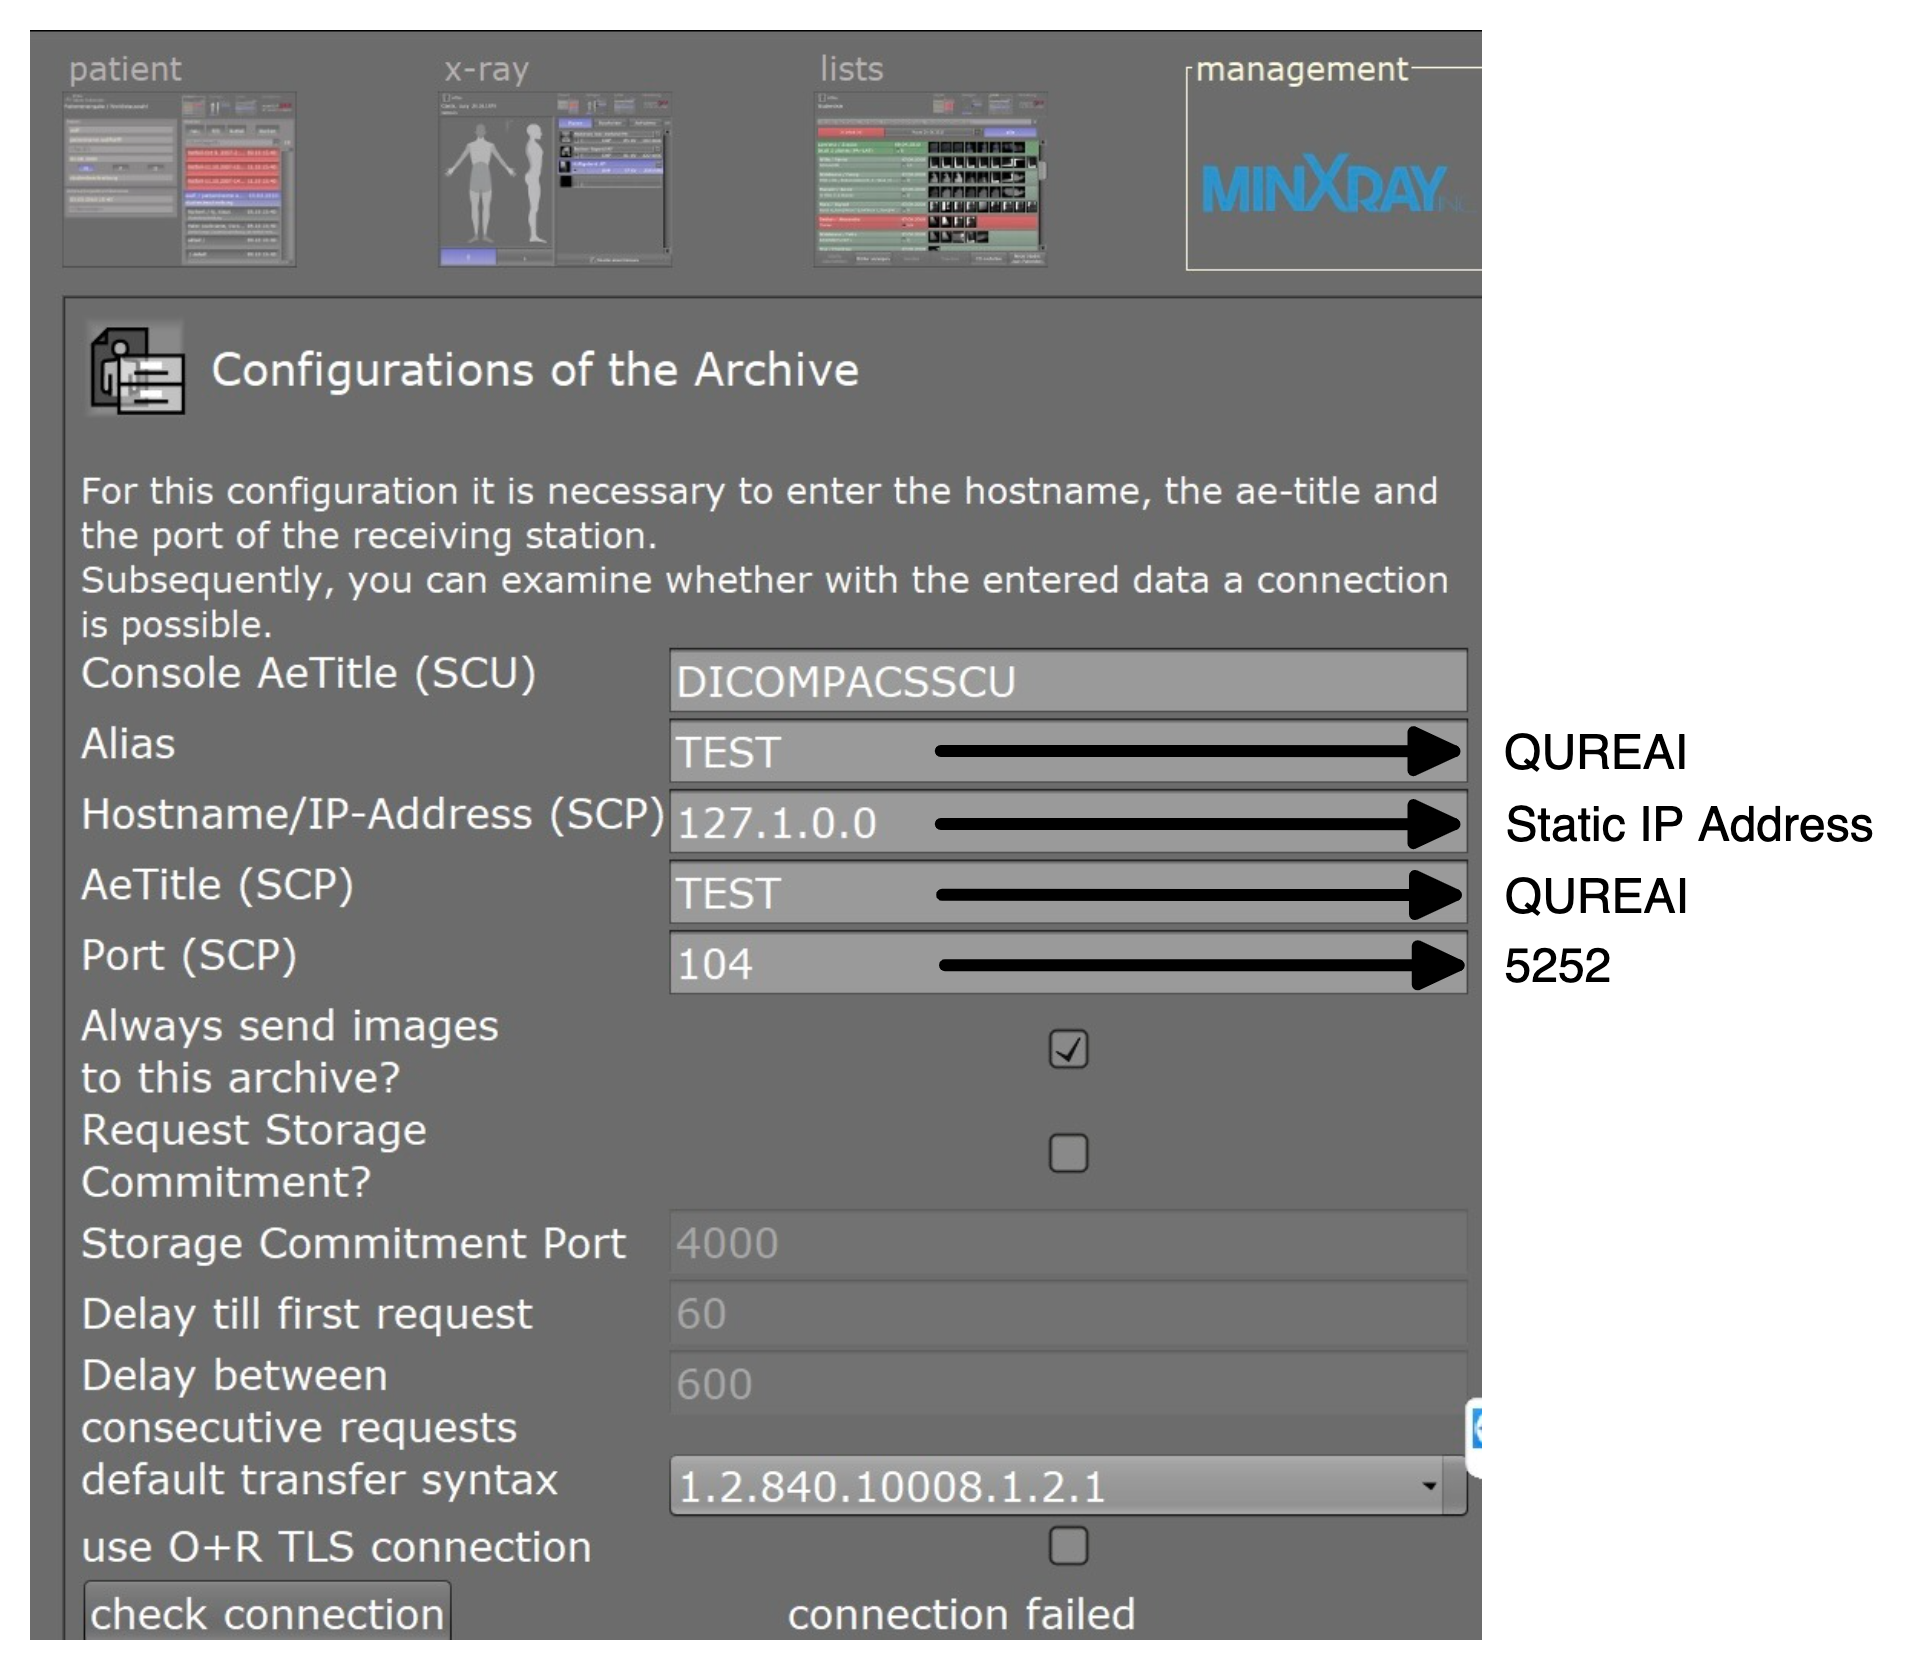
4. On the **Configurations of the Archive**, type the **Alias name**, **IP-Address**, **AeTitle**, and **Port** of the DCMIO as shown.
5. Select **Always send the images to this archive?** checkbox. This option enables the modality to auto-push the study images to DCMIO.
6. After successfully configuring the modality console, click **check connection** to check the connection between the modality and DCMIO.
**Note**: The option for checking the connection varies between vendors. For example, **PING PACS workstation**/**RIS**/**ECHO Dicom**/**check connection**.
7. If the connection between them is **Successful**/**Connected**, the connection is complete.
8. If the **connection failed**, see [Troubleshooting](broken://pages/5aFkcx7WDVz9FnEe5yoz#unable-to-connect-dcmio-with-modality).
---
# Agent Instructions: Querying This Documentation
If you need additional information that is not directly available in this page, you can query the documentation dynamically by asking a question.
Perform an HTTP GET request on the current page URL with the `ask` query parameter:
```
GET https://documentation.qure.ai/users-manual/gateway-user-manual/configuration/setting-up-the-medical-system-modality-configuration/configuring-medical-system-modality.md?ask=
```
The question should be specific, self-contained, and written in natural language.
The response will contain a direct answer to the question and relevant excerpts and sources from the documentation.
Use this mechanism when the answer is not explicitly present in the current page, you need clarification or additional context, or you want to retrieve related documentation sections.