# Troubleshooting
## Unable to Connect DCMIO with Modality
Perform the following check if you are not able to connect DCMIO with modality.
1. Make sure that the **AE Title**, **IP**, and **Port** are added to the modality. For more information, see [Setting up Medical System (modality) configuration](broken://pages/05TTMCVeK0o2meej2t8M#setting-up-medical-system-modality-configuration).
2. Perform the following sanity test to check the connectivity.
* **Ping Network Test**: On the system where DCMIO is installed, open **Windows Start** -> type **Command Prompt** -> **Right-click and Run as Administrator** -> on the prompt Window type `ping IP Address of modality`. For example, `ping 123.45.67.89`.
It sends packets of data to a specific IP on a network and lets us know how long it took to transmit and get a response. If **Ping Network Test** fails, perform any of the following.
* Check if the **Microsoft Defender Firewall** on the system is **On**. Switch it **Off** and repeat the test. For more information on how to switch **Microsoft Defender Firewall** On or Off, see [Turn Microsoft Defender Firewall on or off](https://support.microsoft.com/en-us/windows/turn-microsoft-defender-firewall-on-or-off-ec0844f7-aebd-0583-67fe-601ecf5d774f).
OR
* Check if an **Antivirus**/**Network Firewall** is switched **On**. Switch it **Off** and repeat the test. For more information on how to switch an antivirus Off, see [Turn off Defender antivirus protection in Windows Security](https://support.microsoft.com/en-us/windows/turn-off-defender-antivirus-protection-in-windows-security-99e6004f-c54c-8509-773c-a4d776b77960#:~:text=Select%20Start%20and%20type%20%22Windows,Real%2Dtime%20protection%20to%20Off.).
OR
* Seek your IT team's assistance to bring both systems to the same network range.
* **TelNet Test**: On the system where DCMIO is installed, open **Windows Start** -> type **Command Prompt** -> **Right-click and Run as Administrator** -> on the prompt Window type `telnet ` . For example, `telnet 123.45.67.89 1521`.
It helps to see if the modality IP address is connected properly to DCMIO. If the prompt fails, it might be due to a port block. If **TelNet Test** fails, perform any of the following.
* Check if the **Microsoft Defender Firewall** on the system is **On**. Switch it **Off** and repeat the test. For more information on how to switch **Microsoft Defender Firewall** On or Off, see [Turn Microsoft Defender Firewall on or off](https://support.microsoft.com/en-us/windows/turn-microsoft-defender-firewall-on-or-off-ec0844f7-aebd-0583-67fe-601ecf5d774f).
OR
* Check if an **Antivirus**/**Network Firewall** is switched **On**. Switch it **Off** and repeat the test. For more information on how to switch an antivirus Off, see [Turn off Defender antivirus protection in Windows Security](https://support.microsoft.com/en-us/windows/turn-off-defender-antivirus-protection-in-windows-security-99e6004f-c54c-8509-773c-a4d776b77960#:~:text=Select%20Start%20and%20type%20%22Windows,Real%2Dtime%20protection%20to%20Off.).
OR
* If it fails again, seek your IT team's assistance to enable the DCMIO port on the network firewall, if any.
It is recommended to perform **TelNet Test** on both the systems, that is, the modality system and the system where DCMIO is installed.
* **Netstat**: On the system where DCMIO is installed, open **Windows Start** -> type **Command Prompt** -> **Right-click and Run as Administrator** -> on the prompt Window type `netstat -na` -> check if the DCMIO port is mentioned on the list.
It helps to check the connections over the network*.* If the IP Address and Port of the DCMIO are not on the list, contact your IT team.
**Note**: Make sure to restart the system after performing each test.
If the issue is still persistent, for further assistance contact [support@qure.ai ](https://qure.ai/support/)or your client partner.
## How to validate if DCMIO is receiving a Dicom study or not?
Perform the following steps to validate the DCMIO, if it is not receiving the Dicom study from the modality.
1. Download and install all the DVTK tools from the link [DVTK**.**](https://qure1-my.sharepoint.com/personal/rahul_nair_qure_ai/_layouts/15/onedrive.aspx?id=%2Fpersonal%2Frahul%5Fnair%5Fqure%5Fai%2FDocuments%2FDVTK\&ga=1)
2. After a successful installation, navigate to the **DVTK Storage SCU Emulator** file location. For example, **C:\Program Files (x86)\DVTk\Storage SCU Emulator**. Select and double-click **Storage SCU Emulator**.
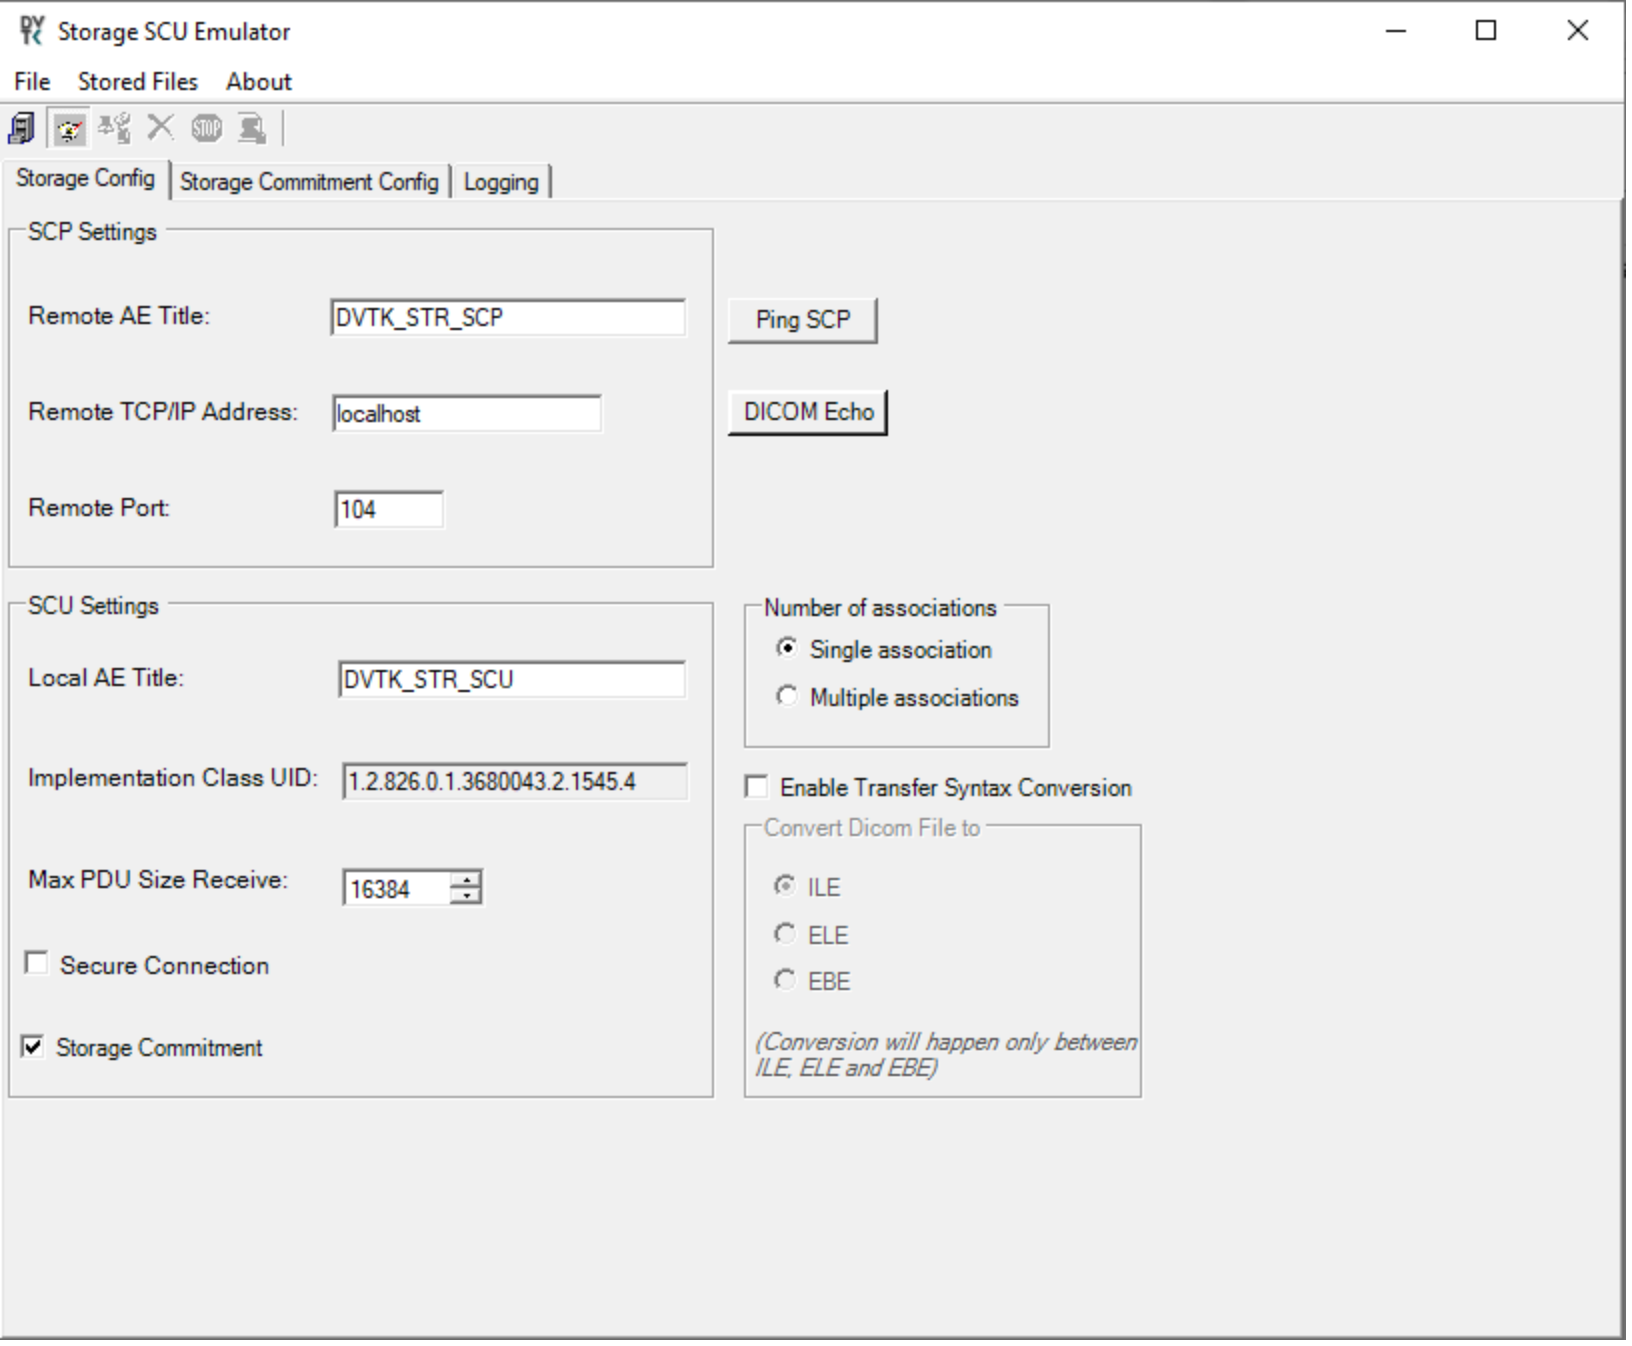
3. The **Storage SCU Emulator** opens.
4. On the **Storage SCU Emulator**, update the **SCP Settings** section as follows:
* **Remote AE Title**: QUREAI
* **Remote TCP/IP Address**: localhost
* **Remote Port**: 5252
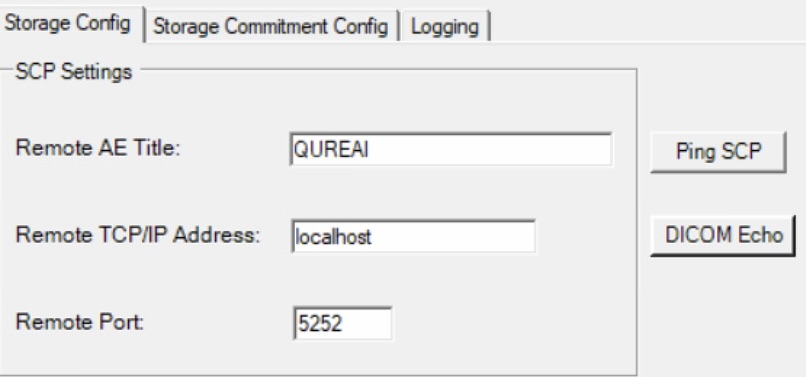
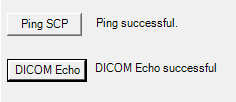
5. Click **Ping SCP** and **DICOM Echo**, to check if both networks are working correctly. If both options are successful, it means that the communication between DVTK and DCMIO is working correctly.
6. If either **Ping SCP** or **Dicom Echo** or **Both** failed, it means that there must be some issue with the network connectivity. Check the IP address and repeat step 5.
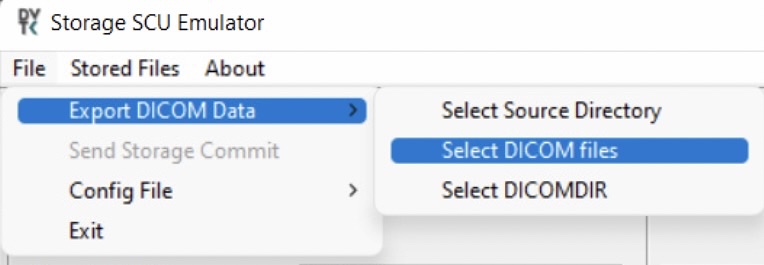
7. Click the **File** option, select **Export Dicom Data**, and then click **Select DICOM files** option. Navigate to the Dicom files source directory and select the Dicom file and click **Open**.
8. After this, the **Storage SCU Emulator** starts to read the contents of the selected DICOM file and transfers it to DCMIO.
9. In the DCMIO, go to the **Status** page and check for the file that was transferred from DVTK.
10. If the DCMIO is not receiving the file or the DVTK is showing an error, there must be some issue with the Dicom file or DCMIO. For further assistance contact [support@qure.ai.](https://qure.ai/support/)
## How to validate if the transmission of the Dicom study from the Medical System (Modality) is working fine?
Perform the following steps to validate the modality, if it is not receiving the Dicoms study from the modality.
1. Download and install all the DVTK tools from the link [DVTK**.**](https://qure1-my.sharepoint.com/personal/rahul_nair_qure_ai/_layouts/15/onedrive.aspx?id=%2Fpersonal%2Frahul%5Fnair%5Fqure%5Fai%2FDocuments%2FDVTK\&ga=1)
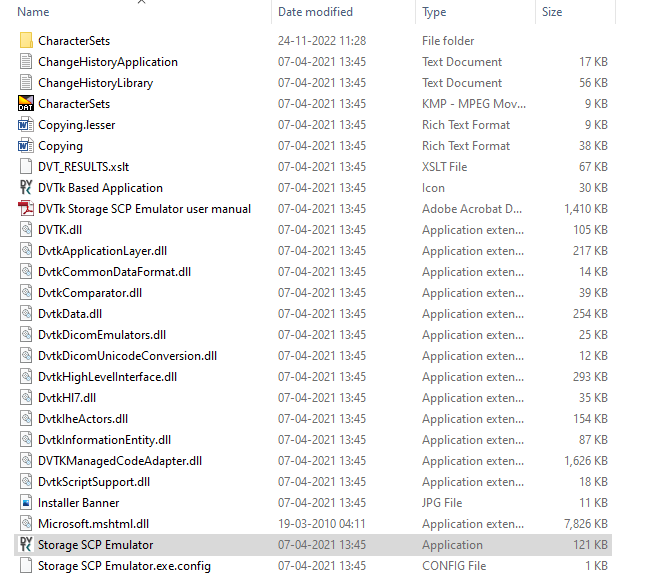
2. After a successful installation, navigate to the **DVTK Storage SCP Emulator** file location. For example, **C:\Program Files (x86)\DVTk\Storage SCP Emulator**. Select and double-click **Storage SCP Emulator**.
3. The **Storage SCU Emulator** opens.
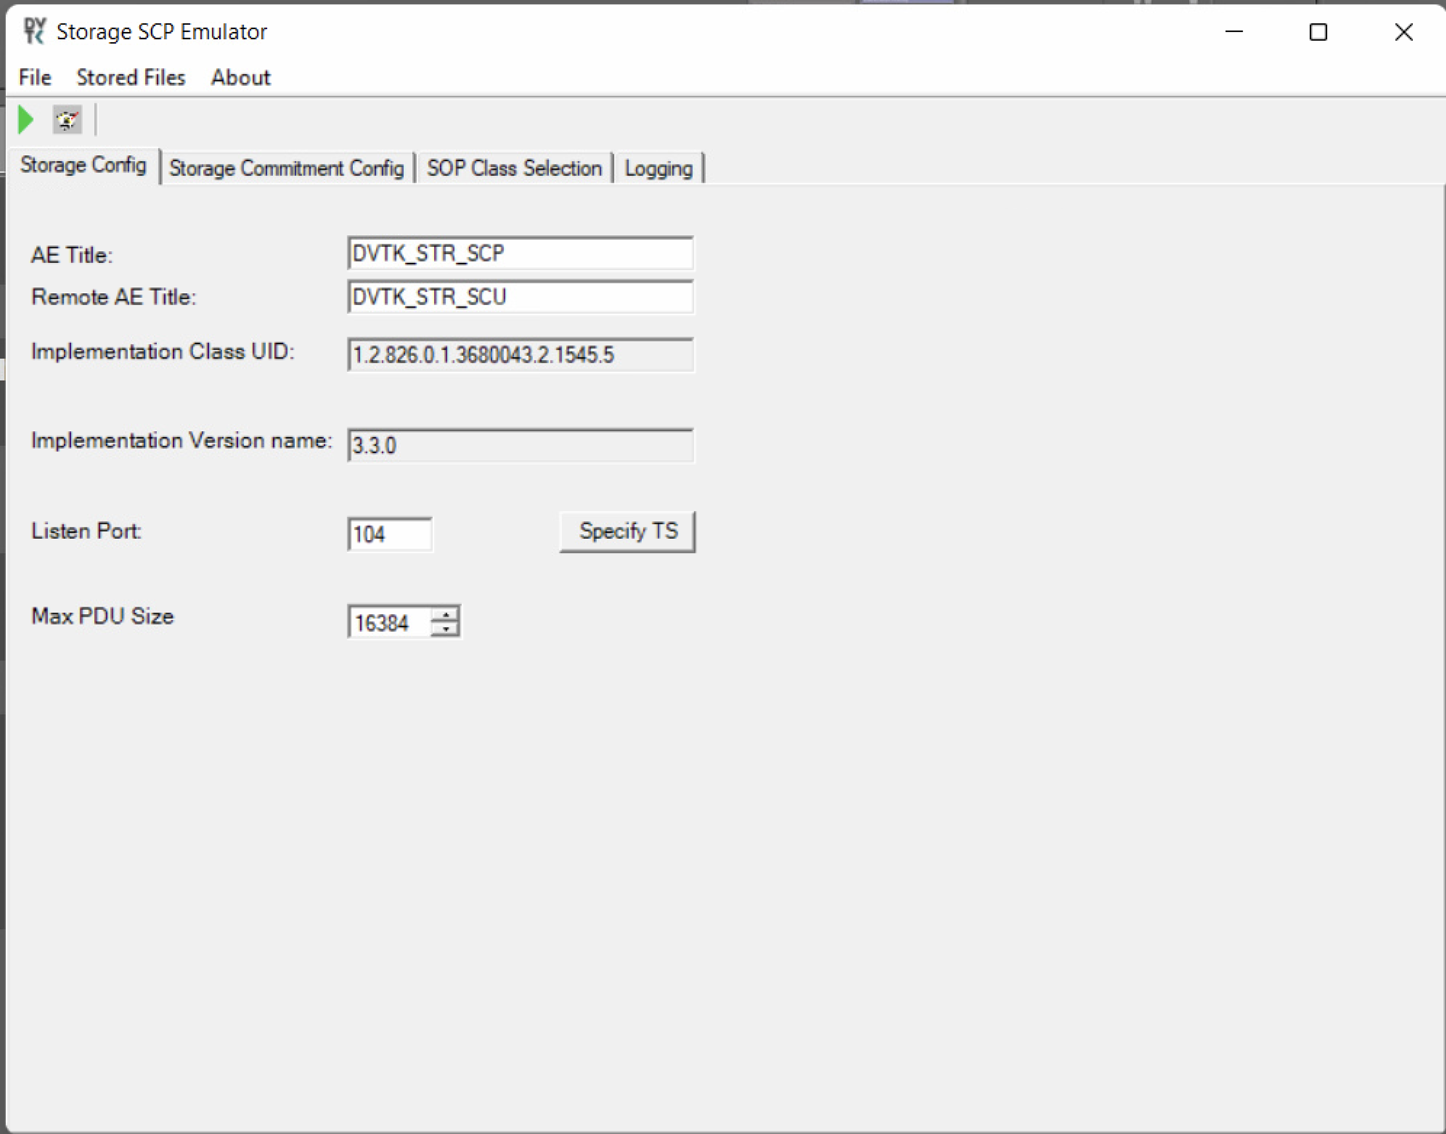
4. On the **Storage SCP Emulator**, create a storage server by updating the **Storage Config** tab.
**Note**: Seek the assistance of your local IT/modality engineer to create a storage server and to check if there is any issue with the C-store.
5. Add the nodes (**AE Title**, **Remote AE Title**, and **Port**) details in the **Storage Config** and then click button to start the SCP emulator storage server.
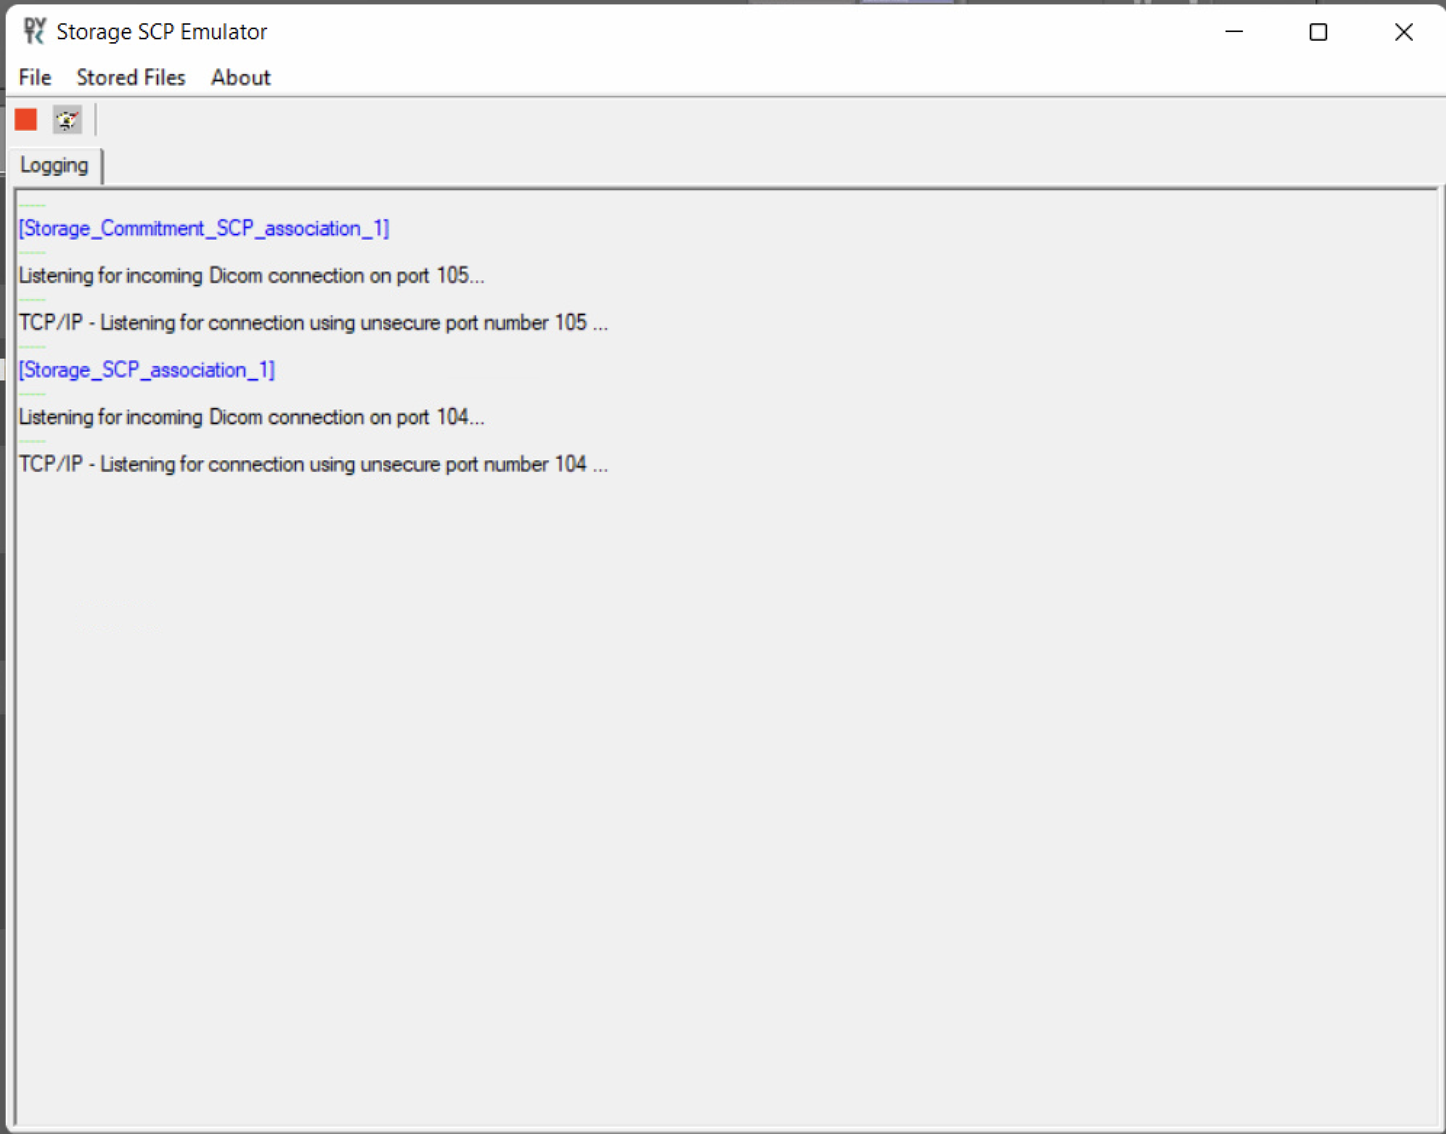
6. After starting the SCP emulator storage server, automatically the **Logging** window opens and shows the progress of the emulation. Click button to stop the progress of the emulation.
7. After the emulation has stopped, check the results from the **Validation Results** pop-up that appears on the **Storage SCP Emulator**. If the image is successfully stored, then image transmission from modality is working fine.
8. If the image is not successfully stored, repeat steps 4 through 7 again. Make sure that the nodes are correct. For further assistance contact [support@qure.ai.](https://qure.ai/support/)
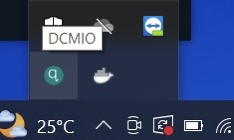
## How to check if DCMIO is in active status?
On the bottom-right corner of the windows taskbar, hover the mouse pointer over in the notification area.
---
# Agent Instructions: Querying This Documentation
If you need additional information that is not directly available in this page, you can query the documentation dynamically by asking a question.
Perform an HTTP GET request on the current page URL with the `ask` query parameter:
```
GET https://documentation.qure.ai/users-manual/gateway-user-manual/troubleshooting.md?ask=
```
The question should be specific, self-contained, and written in natural language.
The response will contain a direct answer to the question and relevant excerpts and sources from the documentation.
Use this mechanism when the answer is not explicitly present in the current page, you need clarification or additional context, or you want to retrieve related documentation sections.

 button to start the SCP emulator storage server.
6. After starting the SCP emulator storage server, automatically the **Logging** window opens and shows the progress of the emulation. Click
button to start the SCP emulator storage server.
6. After starting the SCP emulator storage server, automatically the **Logging** window opens and shows the progress of the emulation. Click  button to stop the progress of the emulation.
 in the notification area.